December 14, 2010

The Daring Cooks Poach to Perfection

Labels: , ,

Poached Egg On Brioche

Jenn from Jenn Cuisine and Jill (jillouci) have challenged The Daring Cooks to learn to perfect the technique of poaching an egg. They chose Eggs Benedict recipe from Alton Brown, Oeufs en Meurette from Cooking with Wine by Anne Willan, and Homemade Sundried Tomato & Pine Nut Seitan Sausages (poached) courtesy of Trudy of Veggie num num.

Thank you Jenn and Jill for choosing this wonderful challenge. I love eggs, specially fried sunny-side-up with runny yolks. I also like poached eggs but it's too much work and I tend to lose a lot of the whites during cooking resulting in a much smaller egg which means less protein. For this challenge, I poached just one egg according to the recipe and the smallish egg reminded me why I bought an egg-poaching pan many years ago which has an insert [with several nonstick cups] that sits on the simmering water in the pan without the eggs touching the water. This way you cook perfectly poached eggs with all the whites intact.

Seitan Sausage

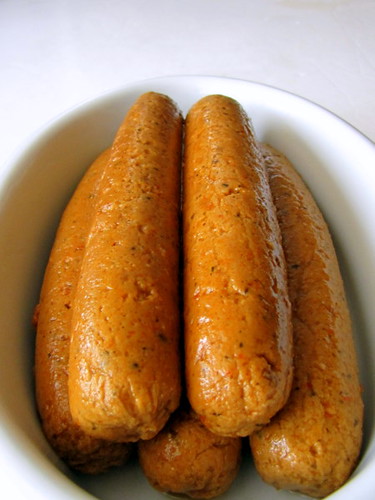
Well anyway, I had the egg on top of a toasted thick slice of brioche and a slice of home cured pork belly ham but did not top it with hollandaise sauce. I sprinkled the egg with sea salt and chopped Italian parsley and had it with slices of the yummy seitan sausage. My sausages are not perfect because they're a bit soft rather than chewy which is how I like seitan sausages but the flavor is fantastic. I'll make them again and will use less liquid; I'm also inspired and will be making Spanish seitan chorizos later this week.

Homemade Sun-dried Tomato And Pine Nut Seitan Sausages
¼ cup pine nuts, toasted
½ of a red onion, diced
1 red chili, chopped
1 cup whole sun-dried tomatoes
¼ cup olive oil
1 cup vegetable stock
2 tablespoons tomato paste
2½ cups vital wheat gluten
1 teaspoon dried thyme
1 teaspoon paprika

for the poaching liquid:
6 cups vegetable stock
3 garlic cloves
2 bay leaves

cheesecloth to wrap the sausages
  • Place 6 cups of stock, the garlic cloves, and the bay leaves in a deep sauté pan or stock pot. Heat on medium.
  • In a food processor finely mince the toasted pine nuts, red onion, chili, and sun-dried tomatoes. Add the vital wheat gluten, dried thyme and paprika to the pine nut mixture and process till combined. In a measuring bowl, whisk the stock with the tomato paste and olive oil. Slowly add to the vital wheat gluten mixture and pulse until you have a smooth dough. You probably will not need all the liquid. Start with ¾ cups of the liquid and add more if needed. Whatever liquid you have left can be added to the poaching liquid.
  • Divide the dough into 10 portions and shape into 6-inch sausages. Wrap each section tightly in cheesecloth and tie off the ends with twine.
  • If the poaching liquid is not yet boiling, turn up the heat until it does. Add the sausages and turn the heat down to a simmer. Simmer gently for 45–50 minutes, or until the sausages are firm. Remove the sausages from the poaching liquid (reserve the liquid if you don’t plan on eating all the sausages immediately). Allow the sausages to cool a little and gently unwrap. These may be refrigerated in their poaching liquid for a week.

Click here to view more Daring Cooks Poached to Perfection

December 10, 2010

Food Friday: Cookies

Labels: , , ,

Christmas Cookies

food friday chiclet

I'm a bit Christmas-y lately and baked shortbread cookies adding two of my favorite Christmas goodie ingredients, candied cherries and golden raisins. I baked the paciencia with red and green swirls, the recipe will be on a future post.

Cherry Sultana Cookies
1 cup butter, softened
¾ cup sugar
2 tablespoons milk
2½ cups all-purpose flour
2 tablespoons tapioca flour
¼ teaspoon salt
½ cup chopped red candied cherries
½ cup green candies cherries
½ cup coarsely chopped sultanas (golden raisins)
3 tablespoons cherry brandy
  • Soak sultanas in brandy for 1 hour. Drain, reserving the brandy, then toss them in 1 tablespoon of the flour. Set aside. Whisk together the rest of the flour, tapioca flour, and salt.
  • In the bowl of a stand mixer with the paddle attachment, beat butter on medium speed until softened. Gradually add sugar and beat on medium-high until fluffy. Add milk and reserved cherry brandy and beat on low for 1 minute. Increase speed to medium and beat until smooth. Add the flour mixture and beat on low until well incorporated. Stir in cherries and golden raisins.
  • Shape into two 9 inch-long logs. Wrap in plastic wrap and chill in the refrigerator for at least 2 hours.
  • Preheat oven to 375°F. Cut the logs into ¼ inch-thick slices. Place on ungreased cookie sheets 1 inch apart and bake for 12 minutes or until the edges are nicely browned. Remove from baking sheets and let cookies cool on wire racks. Store in airtight containers.

December 8, 2010

Bibingka Muffins

Labels: , , ,

Bibingka Muffins


Bibingka, a Philippine rice cake, baked with slices of native white cheese and salted duck eggs is an all-time Filipino favorite merienda (snack) specially the ones from Ferino's and Via Mare restaurants. I remember them so soft, fluffy, and buttery and topped with more butter, a sprinkling of sugar, and freshly grated coconut. These 8-inch cakes are baked on top of small clay ovens filled with live coals and the top of the clay oven is covered with an iron sheet filled with more live coals. It takes just a few minutes to bake them. The cakes can be baked in regular ovens but I find the toaster oven on a very high heat does an excellent job similar to the clay ovens.

A package of store-bought bibingka mix has been waiting for a few weeks now for my attention. I have always made bibingka from scratch with rice flour but sometimes I get lazy and want to have them right away. The thing is, there's really not much difference with the flavor and the amount of time I spent mixing because the packaged bibingka has only baking powder and salt added to the rice flour and maybe preservatives or anti-caking agents and nothing else. I baked half of the mix in muffin cups and the rest in small molds, all lined with cut banana leaves. I didn't have salted duck eggs and topped the muffins with small pieces of kesong puti (farmer's white cheese) which you can substitute with Indian paneer or well-drained and salted cottage cheese. You can also use mild white cheddar cheese or better yet, make some kesong puti. Heck, you can even top the bibingka with chocolate chips, Nutella, or salted caramel and they will still be soft and fluffy and will taste heavenly.

Bibingka
banana leaves, optional
1½ cups rice flour
1 tablespoon baking powder
pinch of salt
¾ cup powdered sugar
4 eggs, beaten until thick and lemon-colored
1½ cups coconut milk
6 tablespoons melted butter
kesong puti (farmer's white cheese), sliced into 1 inch x ¼-inch thick pieces
grated or scraped fresh coconut
butter and sugar, optional

Bibingka muffins
  • Preheat toaster oven to 425°F.
  • Line muffin cups with banana leaves. In a medium bowl, mix all the ingredients, except cheese, grated coconut, and optional butter and sugar, until well incorporated. Batter should be runny; add more milk to adjust consistency. Fill the cups half-full. Top with 2 pieces of cheese and bake for 12 to 15 minutes or until tops are golden brown.
  • Spread some butter and sprinkle sugar on top, if desired. Top with grated coconut.
Bibingka
soft, fluffy, and buttery

December 3, 2010

Food Friday: Eggnog

Labels: ,

Eggnog


food friday chiclet

It's been very cold the past few days [25°F at night and doesn't get much higher during the day]. What could be better to warm up than a cup of eggnog? Soup,of course, but it doesn't have bourbon, rum, and brandy.^__^

Eggnog
2 egg yolks
3 tablespoons sugar
3 cups half and half
¼ teaspoon grated nutmeg
1 tablespoon bourbon
1 tablespoon rum
1 tablespoon brandy
2 egg whites (powdered)
½ tablespoon sugar
  • In a small bowl, beat the egg yolks and the 3 tablespoons sugar until thick.
  • In a small pan, heat the half and half and nutmeg to just boiling. Temper the egg yolks: with the beater on medium-low speed, slowly pour about a cup of the hot half and half mixture until thoroughly mixed. Pour the tempered yolks back into the pan, stir to mix. Cook on medium-low heat until mixture reaches 160°F. Stir in the bourbon, rum, and brandy.
  • Transfer into a measuring cup, cover with plastic, and chill for at least 6 hours or overnight. Beat the egg whites to soft peaks, add the half tablespoon of sugar and beat until stiff. Whisk the egg whites into the chilled mixture. Serve each glass with freshly grated nutmeg.

December 1, 2010

Christmas Fruit Breads: Panettone and Stollen

Labels: , ,

Panettone

One of the breads in The Bread Baker's Apprentice Challenge that I didn't rate favorably was Panettone. It's only fair to give it another try, this time I followed the recipe from Artisan Breads Every Day also by Peter Reinhart. The cake/bread has sourdough starter which gives it a better texture and flavor, IMHO and I love it. This formula can also be used to make stollen and brioche but strangely, I didn't like the flavor of the stollen using this recipe. So I baked a batch of the BBA recipe which I knew a year ago was a keeper. The bread, or cake did not disappoint. It is delicious!

Panettone
adapted from Artisan Breads Every Day by Peter Reinhart

sourdough starter
1½ ounces mother starter, room temperature
6 ounces bread flour
3 ounces water, room temperature

dough
all of the starter
1 tablespoon honey
2 ounces lukewarm water
1 teaspoon instant yeast
4 egg yolks
1 tablespoon vanilla extract
3 tablespoons brandy, rum, or orange juice
7½ ounces bread flour
1¼ teaspoons kosher salt
3 tablespoons sugar
6 ounces unsalted butter, room temperature
2 cups candied fruit (citron, orange peels, lemon peels, golden raisins, cranberries)
  • Make the starter: Combine all the ingredients in a mixing bowl. With paddle attachment, mix on lowest speed for 1 minute, increase to medium and mix for 30 seconds. The starter should be dough-like, sticky but not tacky. Adjust with flour or water as needed. Transfer into the work surface and knead by hand for 30 seconds. Place on a lightly oiled container, cover with plastic wrap, and leave at room temperature for 8 hours. It will double in size.
  • Make the dough: Cut the starter into 10 pieces and put in the bowl of a standing mixer. In a small bowl, stir the honey into the warm water until dissolved then whisk in the instant yeast. Let the mixture sit for 1 minute then add it to the starter. Stir to soften the starter. In another bowl, whisk the egg yolks, vanilla extract, and brandy then add to the starter mixture and stir until evenly incorporated. Add the flour and salt. With the paddle attachment, mix on lowest speed for 2 minutes. The dough will be coarse, wet, and sticky but will hold together. Continue mixing on lowest speed, gradually adding the sugar. Increase the speed to medium-low and mix for 5 minutes, scraping down the sides of the bowl when needed. Switch to the dough hook and mix on medium-low, adding butter 1 tablespoon at a time, waiting until each addition is well incorporated before adding the next piece. Mix until the dough is shiny, soft, and very supple, this should take about 5 minutes. Mix on medium for 5 minutes more until you are able to pull out long, taffy-like strands of dough.
Panettone
the dough should be shiny almost silky, soft, and taffy-like
  • Shape the panettone: Add the fruits, mixing on lowest speed for 1 minute finishing by hand on the work surface. You may use dried fruits instead of candied citrus; or more, less, or none at all. Weigh out the desired size, form into balls, and place in oiled molds: 24 ounces for a full size panettone mold; for very small molds, about 3½ to 4 ounces. Each mold should be 1/3 full. Place the filled molds on a cookie sheet and cover with plastic wrap. Place the sheet inside a food-grade plastic bag and let rise for 12 hours at room temperature.
Panettone
  • Bake the panettone: Preheat the oven to 350°F, 325°F for large size. Bake small ones for 30 minutes and large ones for 45 minutes to 1 hour or until golden brown all over. Internal temperature should read 185°F. Cool the large panettone upside down on a rack.
Here is a preview of the marzipan-filled stollen. I'll publish the recipe in a separate post soon.:-)

Stollen

November 26, 2010

Chicken Relleno

Labels: , ,

Advent Calendar Banner 2010


One of the must-have dishes for Noche Buena, the feast served at Christmas midnight in the Philippines is Chicken Relleno, a whole boneless chicken stuffed with ground pork and seasonings and baked until golden brown. The dish is usually cooked-to-order from stores or the household cooks prepare them. Whether it's homemade or store-bought the Chicken Relleno is always at the center of the Filipino Christmas dinner table celebrating the birth of Jesus Christ.


Chicken Relleno
adapted from FLAVORS OF THE PHILIPPINES
by Glenda Rosales-Barretto

chicken
2½ pounds whole chicken
2 teaspoons sea salt
¼ teaspoon ground black pepper
1 tablespoon soft butter for brushing

stuffing
4 pieces Vienna sausage, chopped
2 pieces Spanish chorizo, chopped
1 medium onion, chopped
1 pound ground pork
¼ cup roasted red bell pepper, diced
¼ cup sliced stuffed olives
3 tablespoons raisins
3 tablespoons grated Edam cheese
2 teaspoons sea salt, or to taste
1 egg, lightly beaten
4 hard boiled eggs
  • Debone the chicken then season inside and out with salt and pepper.
  • In a large bowl, mix all the stuffing ingredients except hard boiled eggs. Fry a teaspoon of the filling and adjust seasoning if needed. Stuff the chicken with the mixture and arrange the hard boiled eggs by pushing the meat filling along the sides of the cavity. Sew the opening securely with kitchen thread.
  • Brush the chicken all over with the soft butter. Bake in a preheated 350°F oven for 1½ hours or until the skin is golden brown.
Read more international Christmas recipes here or click on the banner above starting December 1, 2010. Enjoy.

November 23, 2010

Stuffed Prawns

Labels: , , ,

Stuffed Prawns

The theme for November 2010 Kulinarya Cooking Club is Relleno or Stuffed meat, seafood, or vegetables which is great because I love making and eating rellenos. The rellenos I have made are boneless chicken, squid, crabs, and our favorite, eggplants and green bell peppers and I have also stuffed mushrooms, vegetable marrows, tomatoes, and potatoes. I guess I'm just relleno-happy. ^__^

The only other ingredients left that I haven't made into Philippine-style relleno are prawns, and I would love to stuff whole frogs too if only they were readily available. For the prawn stuffing, I used a combination of smoked ham [instead of the usual ground pork], scallions, chives, and Italian parsley and wrapped them in lumpia (spring roll) wrapper before deep frying until crispy. They are crunchilicious and are the perfect appetizers for the coming holiday meals. I love them served with sweet chilli sauce or spicy banana ketchup.

Stuffed Prawns Ingredients

Stuffed Prawns
12 large prawns, shelled but leave tails intact
¾ cup finely chopped smoked honey ham
1 tablespoon each finely chopped scallions, chives, and Italian parsley
6 sheets lumpia (spring roll) wrapper, cut in half
light olive oil for frying
  • Slit the back of the prawns. Combine ham, scallions, chives, and parsley. Fill each prawn with one tablespoon of the mixture and wrap with spring roll wrapper. Deep fry in hot oil until golden brown and crispy. Serve immediately with sweet chilli sauce on the side.
Stuffed Prawns


KCC


Kulinarya was started by a group of Filipino foodies living in Sydney, who are passionate about the Filipino culture and its colourful cuisine. Each month we will showcase a new dish along with their family recipes. By sharing these recipes, we hope you find the same passion and love for Filipino Food as we do.

Thank you Anna and Dahlia for choosing Relleno and for hosting this month's Kulinarya Cooking Club edition.

November 21, 2010

Uraro (Arrowroot) Cookies

Labels: , ,

Uraro Cookies
Uraro Cookie

Uraro cookies are a childhood favorite of mine, and of many Filipinos I know. These are dry crunchy cookies that have very simple clean flavor, not too sweet, and slightly buttery and milky. My preferred drink with these cookies is iced whole milk. Makes me feel like a kid again.

Although these cookies are occasionally available at the Philippine grocery stores, most of them have more tapioca flour than arrowroot. Since arrowroot flour is now available at most grocery stores, I made them..twice. The first batch was plain, and delicious BTW, and I added chopped dried fruits into the second [half] batch which didn't turn out great. Plain is better IMHO but I'm thinking of adding puffed pinipig or rice crispies next time.

Uraro Cookies
8 ounces sugar
3 large eggs
2 sticks (8 ounces) unsalted butter, room temperature
1 teaspoon pure vanilla extract
12 ounces arrowroot flour
4 ounces tapioca flour
2 ounces very fine dry milk powder
  • Preheat oven to 350°F.
  • Place the sugar in a blender and blend to a powder.
  • In the bowl of a standing mixer with the paddle attachment, beat the eggs until thick and light yellow in color. Transfer into a small bowl.
  • Place the butter in the same bowl and beat on medium-high until light and fluffy.
  • Blend in the beaten eggs and vanilla extract on low until thoroughly combined.
  • In a medium bowl, whisk together the flours, sugar, and milk, and slowly add into the butter mixture, beating on low until well incorporated. Sprinkle more arrowroot flour if the dough appears too soft; or refrigerate the dough for 10 minutes until firm enough for the cookie press.
  • Fill cookie press. With flower or snowflake design plate, form cookies onto ungreased cookie sheets. Bake for 15 minutes or until edges are lightly browned. Transfer cookies on wire racks to cool completely. Store in airtight jars. Yield: about 120 1½ inch cookies.
Uraro Cookies

November 18, 2010

Baked Root and Leaf Vegetable Crisps

Labels: ,

Baked Chips
taro, sweet potato, and beet crisps
kale crisps

food friday chiclet

One of the leafy green vegetables I love is kale. It's so good simply sauteed in extra virgin olive oil, garlic, onion, and sea salt, and is an excellent addition to soups. My favorite preparation of kale is baking them until crispy. The kale crisps are nutty and have an appealing slight bitterness. Absolutely delicious and addicting. Baked root vegetable crisps such as sweet potatoes, beets, taro, and parsnips are also very good for snacking.

  • To make root vegetable crisps: Sweet potatoes, parsnips, and beets: scrub well, leave unpeeled; peel taro. Slice thinly using a mandoline slicer or by hand. In separate bowls, drizzle each root with olive oil, lightly toss, and sprinkle with sea salt. Place a single layer on baking sheets and bake in a 350°F oven for 10 minutes. Flip the pieces and bake for another 10 minutes or until the edges are curly and browned. The beets will take longer to bake, about 10 minute more.
  • To make kale crisps: Remove the leaves from the stem and tear into bite size pieces. Wash and spin dry thoroughly. Drizzle olive oil, lightly massaging it on the leaf surface. Sprinkle with sea salt and place a single layer on baking sheets. Bake in a 325°F oven for 10 minutes. Flip the leaves and bake for another 6 to 10 minutes.

November 17, 2010

José Andrés Red Wine Sangria

Labels: , , ,

Sangria

According to José Andrés, his red wine sangria is one of the most popular drinks in his Jaleo restaurants and I can understand why. The boozy drink is refreshing and can be taken any time of the year, not just during summer. This not-your-typical sangria goes very well with Spanish food, of course.

I used tiny mandarin oranges because that's what I have on my kitchen counter. The original recipe has 1 piece of peeled and sliced [regular size navel] orange.

Red Wine Sangria
adapted from Made in Spain by José Andrés

1 bottle fruity red wine
¼ cup brandy
¼ cup Cointreau
¼ cup vodka
a splash of ruby port
2 mandarin oranges, sliced
2 granny smith apples, diced
1 strip of lemon zest
1 cinnamon stick
¼ cup fresh orange juice
a splash of soda water
  • Combine the wine, brandy, Cointreau, vodka, port, orange slices, apples, and cinnamon stick in a bowl and refrigerate for 4 hours.
  • Pour the mixture into a pitcher filled halfway with ice. Add the orange juice and soda water, give a quick stir and serve.
Sangria
  • Make sure each glass gets ice and fruit.
Check out José's White Wine Sangria recipe here, and a recipe for regular Red Wine Sangria here.

November 12, 2010

Food Friday: Pilipit

Labels: , , , ,

Pilipit
Pilipit

food friday chiclet

Pilipit, Tagalog word for twisted or twist, are hard crunchy sugar-glazed bread twists...one of my favorite snacks back in the Philippines. I have been waiting for them for months now to become available at the Philippine grocer. I made some because I couldn't wait any longer and I really have the munchies for them. It's not complicated to make but isn't easy as pie either.

Pilipit
bread twists
2 cups bread flour
½ teaspoon salt
1 egg
½ cup milk
oil for frying
glaze
1 cup sugar
¼ cup water
  • Pilipit: In a medium bowl, mix all the ingredients except oil and knead on the kitchen counter until smooth. Cover with plastic wrap and let rest for 15 minutes. Divide into 2 equal portions, wrap one half in plastic and set aside. Roll the other half into 1 inch thick log and cut into 1 ½ inch-long pieces. Roll each piece into a pencil-thin rope. Roll both ends in opposite directions which will twist the rope. Bring the ends together, pinch, and twist. Lay each twist on a flat surface, cover loosely with plastic wrap and let rest for 15 minutes. Repeat with the other half of the dough. Heat the oil to 375°F and fry the pilipit until golden brown. Drain on colander lined with paper towels. Let cool completely on wire rack/s.
  • Glaze: Heat the sugar and water in a small saucepan and cook over medium heat until sugar has melted. Let simmer for 2 minutes. Remove from heat and dip the cooled twists one at a time. Let dry on a wire rack, turning them so that both sides dry completely.
  • Store the Twists: Keep the glazed twists in a jar and leave for a few days until they become hard and crunchy.

November 10, 2010

Capellini with Romanesco

Labels: , , ,

Romanesco
Romanesco

I didn't know what this strange-looking vegetable was when I picked it up from the vegetable bin at the store. The label was missing and I asked one of the staff; I was told it's called broccoli romanesco. Although it belongs to the broccoli and cauliflower family, it looks more like a spiky cauliflower than broccoli. After photographing the vegetable, I actually find it pretty, rather than a vegetable that came from outer space. I especially love its chartreuse-like hue. And I liked it even more after blanching and adding to pasta. It has a mild sweet taste not unlike cauliflower but no bitterness that cauliflower sometimes has. It also doesn't have a strong smell.

Capellini with Romanesco, Fennel, and Capers
adapted from here

Capellini with Romanesco, Fennel, and Capers

6 cups water
1 tablespoon salt
¼ cup extra virgin olive oil
1 fennel bulb with some fronds
1 medium onion
1 romanesco, separated into florets
¼ cup capers, drained
sea salt to taste
1 pound angel hair pasta
  • In a large pot heat salt and water and bring to a boil. When water comes to a boil, add the romanesco florets. Cook no more than 2 minutes to retain its color and crunch. Remove with a skimmer and set aside. Keep the water boiling.
  • Thinly slice the fennel and onion and sautée in 3 tablespoons olive oil in a large saucepan until caramelized. Push the caramelized onion and fennel to the side of the pan, turn the heat to high, and add another tablespoon of olive oil. Add drained capers into the olive oil and fry until almost crackly.
  • Cook the pasta in the pot of boiling water and cook for 4 minutes.
  • While pasta is boiling, toss the drained florets into the sauce pan of onions, fennel, and capers and cook until heated through. Turn the heat off.
  • Set aside 1 cup of pasta water, drain the pasta then add to the skillet and toss gently, adding some of the reserved water if it appears too dry. Transfer into a serving platter and serve while hot (I also like it at room temperature).

Romanesco
it looks like a miniature Christmas tree

November 8, 2010

Hot-Smoked Duck Ham

Labels: , ,

Smoked Duck Ham

I never thought duck ham could be so delicious. I bought a whole duck which I was going to grill Peking-style but it got very cold outside at 30°F last Saturday. I didn't want to look ridiculous grilling while wearing a winter jacket so I abandoned the idea of Peking duck as it is a very involved process if cooked in a regular oven. I started to debone the bird but stopped to check for duck preparations in CHARCUTERIE by Michael Ruhlman and Brian Polcyn. Hot-smoked duck ham instantly caught my attention. It takes 2 to 3 days to prepare but it's worth all the work. The ham is flavorful, tender, and the sweetish salty fat deliciously melts in the mouth. If it's a little bit drier, it's almost like prosciutto or Spanish jamon Serrano. I'll see if I can find already boned duck breasts at the stores and will definitely make again for the coming holiday.

If you are planning to smoke the ham indoors in the oven you can use 2 large disposable aluminum roasting pans, one smaller aluminum pan to catch the drippings, a metal rack, and strips of aluminum foil. Soak 1 cup of hickory chips in water for 30 minutes and place them on both sides of one of the pans, then place the small aluminum pan in the middle, place the rack on top of the small pan, then lay the duck breasts on the metal rack. Cover with the second roasting pan, covering the sides where the pans join with strips of aluminum foil. If you have a kettle smoker, set the temperature to 180° F.

Hot-Smoked Duck Ham
adapted from CHARCUTERIE by Michael Ruhlman

brine
2 quarts water
¾ cup kosher salt
¼ cup sugar
4 teaspoons pink salt
½ cup maple syrup
½ cup Madeira
1 bunch fresh thyme
2 bay leaves
1 tablespoon juniper berries
1 tablespoon chopped sage

duck

6 boneless Long Island duck breasts, skin on
  • Brine: Combine all the ingredients in a large pot. Place over medium-high heat and bring to a simmer, stirring to dissolve the salt and sugar. Remove from heat and let cool to room temperature, then refrigerate until completely chilled.
  • Duck: Add to the chilled brine and weight down with a plate. Refrigerate for 8 to 12 hours. Rinse the breasts under cold water and pat them dry. Refrigerate them on a rack set over a small baking sheet and refrigerate for at least 4 hours, or up to 24 hours.
  • Hot-smoke: Preheat the oven to 180 or 200°F and cook the breasts for 2½ hours or until internal temperature registers 160°F. Refrigerate until chilled.
Smoked Duck Ham
the most delicious breakfast I ever had: smoked duck ham, scrambled eggs, sweet rolls and sour cherry preserves, and espresso coffee

November 4, 2010

Pork Menudo Pie

Labels: ,

Pork Menudo Pie

I suddenly was craving for savory pie earlier today. I have pie dough already divided into very small disks in the refrigerator and with some leftover pork menudo, I baked a few small pies. Pork menudo and buttery crust, it's so good!

food friday chiclet

Pork Menudo
¼ cup extra virgin olive oil
1½ pounds pork, diced into ¼ inch pieces
4 cloves garlic, chopped
1 medium onion, chopped
1 red bell pepper, diced
2 teaspoons sea salt
ground black pepper
1 large tomato, diced
1 cup water or chicken broth
1 large potato, diced into ¼ inch pieces
½ cup diced pork liver, sauteed in 1 teaspoon oil, optional
1 cup frozen green peas
  • In a medium saucepan, heat olive oil, add garlic and onion, stir fry for 2 minutes. Add red bell pepper, and pork. Stir fry for 3 minutes. Add tomato, salt, black pepper, and water. Bring to a boil, cover and simmer for 30 minutes. Add potatoes, simmer for 5 minutes. Mixture should be thick and saucy. Add cooked pork liver, if using, and peas and cook 2 minutes until peas are heated through. Serve with rice, in pan de sal. Or bake them in flaky pie shells.

November 1, 2010

Red Anjou Pear Tart

Labels: , ,

Red Anjou Pear Tart
Red Anjou Pear Tart

Pears are not a favorite of mine but once in a while when I see a really interesting recipe using red anjou or Starkrimson pears I get easily seduced. It is hard to resist this pear tart and I have to admit I have fallen head over heels in love after one bite. The tart has the right amount of sweetness, the spices are not overwhelming, and the tender but not mushy pears are not gritty at all. What a wonderful fall dessert and just perfect for this year's Thanksgiving dinner.

Red Anjou Pears


Red Anjou Pear Tart
adapted from Vanilla-spiced Caramel and Pear Tart
November 2010 issue of bon appétit

crust

1 pound puff pastry, store-bought or homemade

pears
3 tablespoons unsalted butter
½ cup sugar
1 cinnamon stick
1 whole star anise
3 whole cloves
pinch of coarse kosher salt
half of a vanilla bean, split lengthwise
6 medium firm but ripe red Anjou pears, peeled, halved lengthwise, cored

filling

¼ cup unsalted butter
half of a cinnamon stick, broken in half
2 whole star anise
6 whole cloves
half of a vanilla bean, split lengthwise in half
4 tablespoons sugar
1 large egg
a pinch of coarse kosher salt
1 ½ tablespoons all purpose flour
1 egg white, beaten
  • Crust: Roll out pastry into a 12-inch round. Transfer pastry to a 10-inch springform pan, pressing pastry firmly onto bottom and 1 ½ inches up sides of pan. Cover with plastic film and freeze crust until firm, about 2 hours, or leave in the freezer overnight until ready to bake.
  • Pears: Melt butter in heavy large skillet over low heat. Add sugar, spices, and salt. Scrape the seeds from vanilla bean; add bean and seeds to the skillet. Increase heat to medium-high and cook, stirring until sugar melts and turns brown, about 3 minutes. Reduce heat to medium; add pears, rounded side down. Cook until pears are almost tender, turning and moving skillet around occasionally for even cooking, 10 to 15 minutes, depending on ripeness of pears. With a rubber spatula, carefully turn pears over and continue to cook until pears are very tender, about 10 minutes longer. Remove skillet from heat. Let the pears cool in skillet with the spices.
  • Filling: Melt butter in small saucepan over low heat. Scrape seeds and add to the skillet along with the bean. Add cinnamon, star anise, and cloves. Increase heat to medium; cook until butter is golden, about 3 minutes. Remove vanilla bean and spices from butter; discard. Whisk sugar, salt, and egg together in a medium bowl then whisk in flour. Gradually whisk in the browned butter into egg mixture.
  • Bake the tart: Position rack in center of oven; preheat to 400°F. Brush frozen crust with beaten egg white. Pour filling into crust; spread evenly over bottom of crust. Using a slotted spatula, remove pears from skillet, allowing excess syrup to drain back into skillet; reserve syrup. Arrange pears, rounded side up, atop filling. Bake for 1 hour or until crust is deep golden and filling is set and brown at the edges. Run a small knife around sides of pan to loosen the tart. Release pan sides. Transfer tart to a platter and let stand uncovered for a few minutes to cool slightly.
  • To serve: Just before serving, boil syrup in skillet until reduced to about 1/3 cup, 1 to 2 minutes. Discard spices. Drizzle syrup over pears. Serve tart slightly warm.
Red Anjou Pear Tart

October 29, 2010

Crusty Pandesal

Labels: , , ,

Hamdesal
hamdesal, ham and egg sandwich on crusty but soft pandesal

Sausage, Egg, and Cheese Pandesal
sausage Mcpandesal with egg and cheese


food friday chiclet


The recipe for these crusty but soft pandesal buns is adapted from the hamburger bun recipe in ADVANCED BREAD AND PASTRY by Michel Suas. It has a 12-hour pre-ferment which I thought would make the pandesal more flavorful. And they are specially with brown sugar glazed ham and moist omelet or breakfast sausage patties, egg, and a slice of sharp cheddar cheese.

Crusty Pandesal
adapted from Hamburger Buns
ADVANCED BREAD AND PASTRY by Michel Suas

sponge

4½ ounces bread flour
2 ¾ ounces water
1/8 teaspoon instant yeast
  • Mix all the ingredients in a bowl until well incorporated. Cover with plastic wrap and allow to ferment at room temperature (65 to 70°F) for 12 hours.
final dough
13 ¼ ounces unbleached all-purpose flour
8 ½ ounces water
1 1/8 teaspoons instant yeast
2 teaspoons kosher salt
1 ½ tablespoons sugar
1 ½ ounces soft butter
¼ cup milk powder
sponge
very fine bread crumbs
  • In the bowl of a standing mixer with the dough hook attachment, mix all the ingredients except bread crumbs on low until fully incorporated. Increase the speed to medium and knead for 5 to 6 minutes until a soft smooth dough forms.
  • Transfer into a container, cover with plastic wrap and let ferment on the kitchen counter for 45 minutes to 1 hour.
  • Knead lightly then divide and scale to 2 ounces. Cover and let rest for 30 minutes. Shape into ovals and flatten slightly. Dredge in bread crumbs and place on sheet pans 2 inches apart. Cover with plastic wrap, put the pans in food grade plastic bags to proof for 1 hour and 30 minutes.
  • Bake in a preheated 400°F oven for 10 minutes, lower the heat to 375°F and bake for another 10 to 15 minutes or until golden. Let cool on wire racks.

October 27, 2010

Pancake Puffs

Labels: , , , ,

Poffertjes
Poffertjes
yummy and fun to eat yeasted buckwheat mini pancake puffs

This pancake popper pan caught my eye not only because of the shape but also because it's made here in the good old USA by Nordic Ware. It's very rare nowadays to find kitchen tools with a mark that says "Made in the USA". While at the store trying to justify buying another cooking pan that might end up in the cupboard unused, I remembered the teeny buckwheat Dutch pancake puffs (poffertjes), the similar but slightly larger Danish apple pancake puffs (aebleskiver), and the Japanese octopus balls. Plus, I thought I could probably use it to fry perfectly round meatballs too. And so it went into my shopping cart.*Sigh*

Pancake Popper Pan

Poffertjes (Dutch Mini Pancake Puffs)
1 cup bread flour
1 cup buckwheat flour
1½ teaspoons instant yeast
½ teaspoon kosher salt
10 ounces warm whole milk
1 egg, beaten
2 tablespoons golden syrup
2 tablespoons melted butter
powdered sugar
butter

Poffertjes
  • Whisk together the flours in a large bowl. Add the yeast and salt and stir to mix. Add the milk slowly, stirring constantly, then add the syrup and beaten egg. Mix well. Cover with plastic wrap and leave on kitchen counter to rise for 45 minutes.
  • Heat poffertjes pan if you have one, or a skillet or griddle and brush with melted butter. Pour half a tablespoon, or 1 tablespoon for bigger cakes, of the batter and cook until the poffertjes become light brown and dry at the bottom. Turn them with a small fork to cook the other side (I used a tool for making/dipping chocolate candies).
  • Sprinkle generously with powdered sugar and put a small lump of butter on top. Enjoy while still warm.

Aebleskiver

Aebleskiver
slightly larger apple filled Danish pancake puffs

2 eggs
1 tablespoon sugar
¼ teaspoon salt
1 cup all-purpose flour
½ teaspoon baking powder
½ teaspoon baking soda
1 cup buttermilk
2 tablespoons melted butter
powdered sugar
diced apple
  • Beat egg yolks until light and fluffy, then add the sugar and salt.
  • Sift the flour with baking powder and baking soda, then add it to the egg mixture, alternating small amounts with the addition of the buttermilk, as you continue mixing.
  • Beat the egg whites until stiff, then gently fold them into the batter.
  • Heat the pancake popper pan. Brus each cavity with melted butter and drop batter into cups, filling each about 2/3 full. Place some apple in the center of each cavity.
  • Cook over medium heat until browned and crisp on bottom. Turn each cake with a fork to cook the other side. The aebleskiver is done when a toothpick, or cake tester, inserted in the center comes out clean.
  • Remove cakes from pan and sprinkle with powdered sugar, if desired. Best when served warm.

October 24, 2010

Fried Grouper with Sweet and Sour Sauce

Labels:

Fried Grouper with Sweet and Sour Sauce

Its was a pleasant surprise when I saw small-ish whole grouper at the grocery store. Grouper is usually sold already filleted from ginormous fish. I got the smallest one, although still very large at almost 3 pounds, and over a foot long. While at the store I was already imagining it deep fried on a bed of red and green peppers with sweet and sour sauce just like the ones in Hong Kong restaurants.

I couldn't decide if I should prepare it Chinese-style or Filipino escabeche. They are very similar, the cooking method and ingredients except for soy sauce are almost identical. I guess the Filipino escabeche is another fusion of Chinese and Spanish recipes and became a Filipino dish just like arroz caldo.

I chose to prepare the whole grouper Chinese-style because I haven't had this dish in a long long time. I realized I didn't have a pan big enough to accomodate the big fish; I used my wok which was large enough but I had to tilt the pan several times to fry the tail which didn't become crispy. No problem, the rest of the fish was crispy, perhaps not as crisp as the restaurant's but it's good enough for me. And besides the dish is sooo yummy.

Fried Grouper with Sweet and Sour Sauce
fish
1 whole grouper, gutted and cleaned
sea salt
ground white pepper
all purpose flour, optional
vegetable oil

sauce
1 clove garlic
3 large shallots
2-inch piece fresh ginger
1 green bell pepper
1 red bell pepper
1 tomato, cut into wedges, optional
1 tablespoon light olive oil
4 tablespoons sugar, more or less to taste
5 tablespoons cider vinegar
½ cup water
1 tablespoon soy sauce
1 teaspoon sea salt, or to taste
2 tablespoons cornstarch mixed with ¼ cup water.
  • Cut the garlic, shallots, ginger, and bell peppers into matchstick size pieces.
  • Heat 6 cups oil in a large pan or wok on medium high.
  • Pat dry the fish inside and out and make 3 slits across on both sides. Season inside and out with 1 teaspoon salt and half a teaspoon of white pepper. Dredge in flour, if desired; remove excess flour.
  • Deep fry until skin is crisp.
  • While fish is frying prepare the sauce. In a medium saucepan, heat the oil and saute the garlic, shallots, and ginger for 2 minutes. Add the rest of the ingredients except the cornstarch mixture. Simmer for 2 minutes, taste and adjust seasoning, then add the cornstarch mixture. Simmer until sauce is clear and has slightly thickened.
  • Transfer on a serving platter and place the cooked fish on top of the sauce. Serve immediately with steamed or Chinese-style fried rice.

 
Design by New WP Themes | Bloggerized by Lasantha - Premiumbloggertemplates.com