March 29, 2009

It's Easy Being Square

Labels: , , , ,

glazed fudge brownies


There are so many choices of baking pans with all sorts of shapes and designs in the baking aisles at chain stores and discount kitchen shops. Last year I got a coated metal with 2-inch squares and a silicone with 1-inch squares. I use them for single serve brownies and cakes. Baking the brownies in these pans eliminates the step of cutting it into squares. They are easier to store and serve, and I like it for portion control. Isn't that cool? The flexible silicone is more versatile as it can be used for the cutest mini-cakes and to freeze embedded liquids to decorate drinks, or for freezing lemon juice or stock.


glazed fudge brownies, calamansi cupcake squares


Hip To Be Square is this week's Lasang Pinoy Sundays, a weekly food photography meme, hosted by SpiCes.

March 25, 2009

Biryani

Labels: , , , , ,


seitan biryani

I'm new to Indian food. It's only recently that I started liking this highly seasoned cuisine. I finally got an Indian cookbook after making and loving Chicken Kerala a few months ago. The Lamb Biryani in the book appealed to me right away but I substituted seitan for the lamb because I wanted a meatless dish. I made seitan by mixing vital wheat gluten with water, then cooking the cubed/sliced seitan in water seasoned with soy sauce and chopped onion. For the vegetables I steamed green beans, carrots (purple and regular orange), and skinned baby lima beans. This dish is very yummy and healthy too.

Lamb Biryani
2 pounds boneless lamb leg or shoulder, cut into 1½ inch cubes
3-inch piece of ginger, grated
2 garlic cloves, crushed
2 tablespoons garam masala*
½ teaspoon chilli powder
½ teaspoon ground turmeric
4 green chillis, finely chopped
2/3 cup chopped cilantro
¼ cup chopped mint leaves
2 teaspoons salt
2½ cups basmati rice
4 onions, thinly sliced
¼ teaspoon salt
¼ cup light olive oil
2 ounces melted butter or ghee
1 cup plain thick yogurt
3 tablespoons lemon juice
½ teaspoon saffron strands, soaked in ½ cup hot milk
steamed vegetables for topping: sliced carrots, green beans cut into half inch pieces, green peas, cauliflower
  • Mix the lamb cubes in a bowl with the ginger, garlic, garam masala, chilli powder, turmeric, green chilli, coriander, mint, and salt. Cover and refrigerate overnight.
  • Wash the rice in a sieve under cold, running water until the water runs clear. Set aside.
  • Put the sliced onion in a sieve, sprinkle with the salt and leave for 10 minutes to drain of any liquid that oozes out. Rinse and pat dry.
  • Heat oil and butter in a large saucepan, add the onion and fry for about 10 minutes or until golden brown. Drain onions, reserve the oil and butter.
  • Transfer the lamb and marinade into a casserole and add the browned onion, 2 tablespoons of the reserved oil and butter, and the yogurt, and cook on low heat, covered, for 40 minutes, or until lamb is tender.
  • Preheat oven to 400 degrees F.
  • In a separate saucepan, boil enough water to cover rice. Add the rice to the pan. Return the water to the boil, cook the rice for 5 minutes, then drain well and transfer into a bowl. Mix in 2 tablespoons of the oil and butter, the lemon juice, and a little salt and gently mix. Spread the rice evenly over the meat. Spoon the saffron milk over the rice.
  • Cover tightly with foil and bake for 40 minutes. Serve topped with salted steamed vegetables.
*Garam Masala
from my cookbook THE FOOD OF INDIA a journey for food lovers:

Garam Masala means "warming spice mix". It can be a mixture of whole or ground spices. Recipes are numerous but they are all aromatic, rather than "hot" mixes.

makes 3 tablespoons
8 cardamom pods
2 bay leaves, torn into small pieces
1 teaspoon black peppercorns
2 teaspoons cumin seeds
2 teaspoons coriander seeds
1 two-inch cinnamon stick, broken into small pieces
1 teaspoon cloves
  • Remove the seeds from the cardamom pods. Put all the ingredients in a spice grinder or coffee grinder and grind to a fine powder. Store into a small airtight container until needed.

saffron milk and garam masala, ghee
uncooked seitan, steamed vegetables

very colorful and delicious meatless biryani

March 19, 2009

Seriously Citrusy

Labels: , , , , , ,

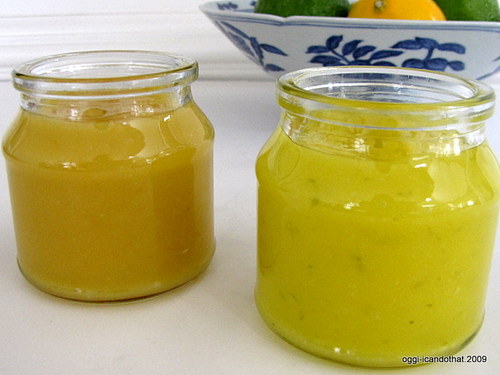
Meyer lemon curd and lime curd

There's an abundance of assorted citrus fruits at Costco and I couldn't resist their bright sunny spring colors. I haven't stopped buying Cara Cara oranges, got a large bag each of limes and Meyer lemons, and one humongous bag of Jaffa Sweeties, a cross of pomelo and white grapefruit. They are soooo deliciously sweet I want to eat them all day long everyday, the whole year round if possible. These citrus fruits are developed in Israel and just like Cara Cara this is the first time I heard of them. To my dismay when I went back to get another bag they were all gone after only a week in the store.


Jaffa Sweetie, Cara Cara Orange, Calamansi


Jaffa Sweeties, I love you so

Meyer lemons


I have so much limes and lemons there isn't space in the refrigerator to store them. I froze some of the juice in a Wilton silicone baking mold with 1-inch squares for tiny cakes or brownies. Each square holds exactly 1 tablespoon of liquid, perfect for freezing citrus juices for later use. I made some into lime curd and lemon curd, both are utterly yummy, sweet and slightly tart. Next week, I will be busy baking lemon, lime, or calamansi pound cakes.

Lime or Lemon Curd
½ cup butter, diced
1 cup sugar
½ cup lime juice (or Meyer lemon juice)
grated zest of two limes (or Meyer lemons)
4 extra large eggs or 5 large eggs, lightly beaten
  • Put butter, sugar, juice, and zest into a glass bowl set over a saucepan of simmering water. Let butter melt, then gradually whisk in the beaten eggs. Cook, stirring constantly, until thickened to the consistency of instant pudding, about 15 minutes.
  • Remove from heat, wipe bottom of bowl, and cool for a few minutes. Transfer the curd into a clean jar, cool completely, cover jar, and store in the refrigerator.
  • Spread on buttery biscuits, crumpets, English muffins, crisp Belgian wafers, fruits...
great on chewy crunchy toasted English muffins

March 15, 2009

Soymilk

Labels: , , ,


warm freshly made soymilk: so good

We have been buying soymilk since forever and only recently noticed that most brands have additives such as sugar to mask the "beany" flavor and xanthan gum or carageenan for a creamier texture. Making soymilk was never in my must-make list until I saw and clicked on an ad for soymilk maker. I didn't know these makers are available for soymilk enthusiasts. Searching online for making soy milk without a machine, I found a lot of websites including Martha Stewart teaching how to make soymilk at home.

I happen to have a 32-ounce bag of soy beans sitting in the pantry, I can't remember why I bought it. Maybe it was waiting to be made into milk. After one sip of the still warm delicious plain no-sugar milk, I am convinced homemade soymilk tastes superior to the ones in cartons. The milk has the slight beany taste of silken tofu which is why I love it. I noticed that unlike the store-bought there are no grits at the bottom of my cup and in the jar. The thickness can also be adjusted to individual preference.

Here's a a how-to video


For a little more than a liter of soymilk you will need:
1 cup dried soy beans
water
blender
a large piece of washed and dried muslin or fine cheesecloth
tall stock pot
sieve
2 large bowls
heat-proof spatula
pinch of salt and 1 tablespoon raw sugar, if desired
  • Rinse soybeans, drain, and add water to cover 2 inches over the beans. Soak beans overnight at room temperature. The next day, drain the water, rinse twice, and drain very well. Hull the beans, if preferred. Place half of the beans with double the amount of water in the blender and blend on high for 2 minutes. Transfer into a large bowl. Remove all the foam on top with a small sieve. Repeat with the rest of the beans.
  • Place a sieve on top of another bowl, line with the muslin. Pour the liquid through the muslin and let drip into the bowl. Gather the corners of the muslin and twist the top. Press to extract as much liquid as possible.
  • Boil 1 cup of water in the stockpot, add the extracted liquid, add salt and sugar if using, and over high heat let the mixture come to a boil, constantly stirring and scraping the bottom. Turn down the heat to medium and simmer the milk for 25 minutes. Stir down the foam as it rises until it dies down. Transfer into a clean jar, cover, and refrigerate.

dry soy beans, soaked and hulled beans, simmering soymilk, okara, toasted okara

In making soymilk at home I also learned about okara, the pulp left in the cheesecloth after straining the liquid, which I will use for baking breads; and accidentally soybean skin (yuba). I removed the skin that formed on top of the cooking milk, ate it when it had dried a little, and it tasted exactly like the vegetarian dish we always have at our favorite Chinese restaurant. By boiling the milk and collecting the skin until all the milk is used up, I might be able to recreate my favorite Chinese dish at home. That will be my next project.:-)

 
Design by New WP Themes | Bloggerized by Lasantha - Premiumbloggertemplates.com